Featured

Photo Contest: GuruShots

This week I had the opportunity of submitting two of my photos that I have taken throughout the duration of the semester in two of GuruShots photo contests. Here is a link to the site: https://gurushots.com/. Hopefully you will see some of my photos on there!

ART DROPS CONTEST:

RAIN DROP

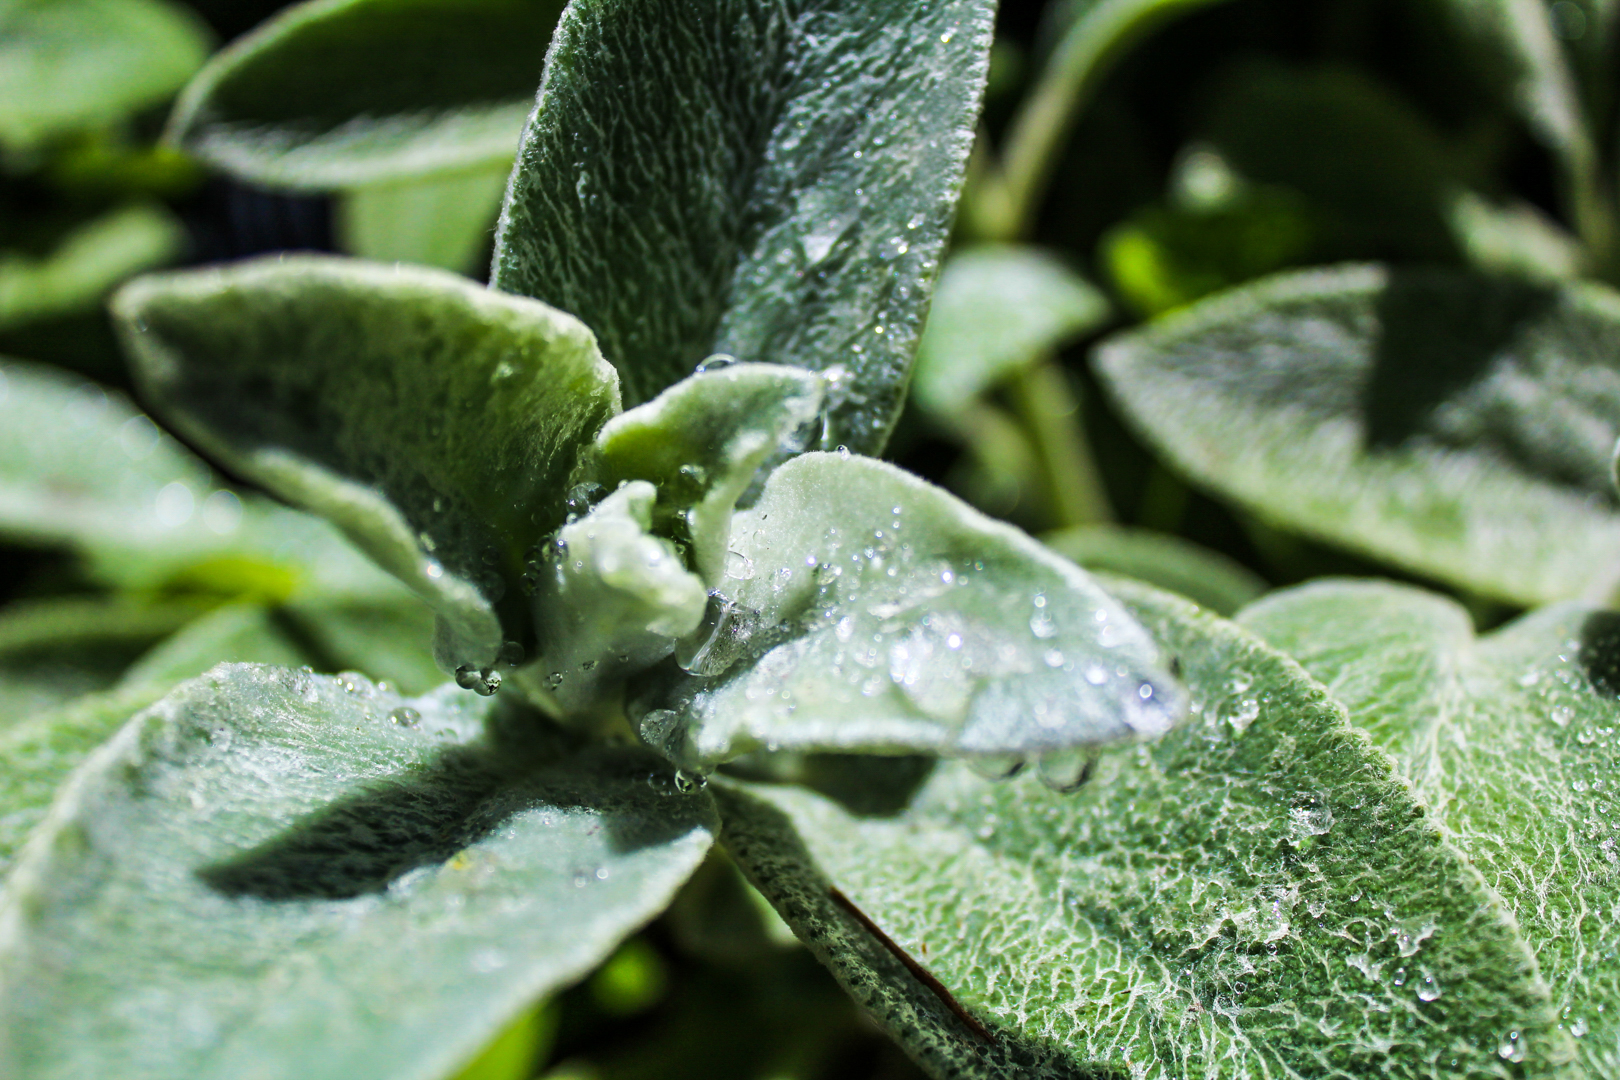
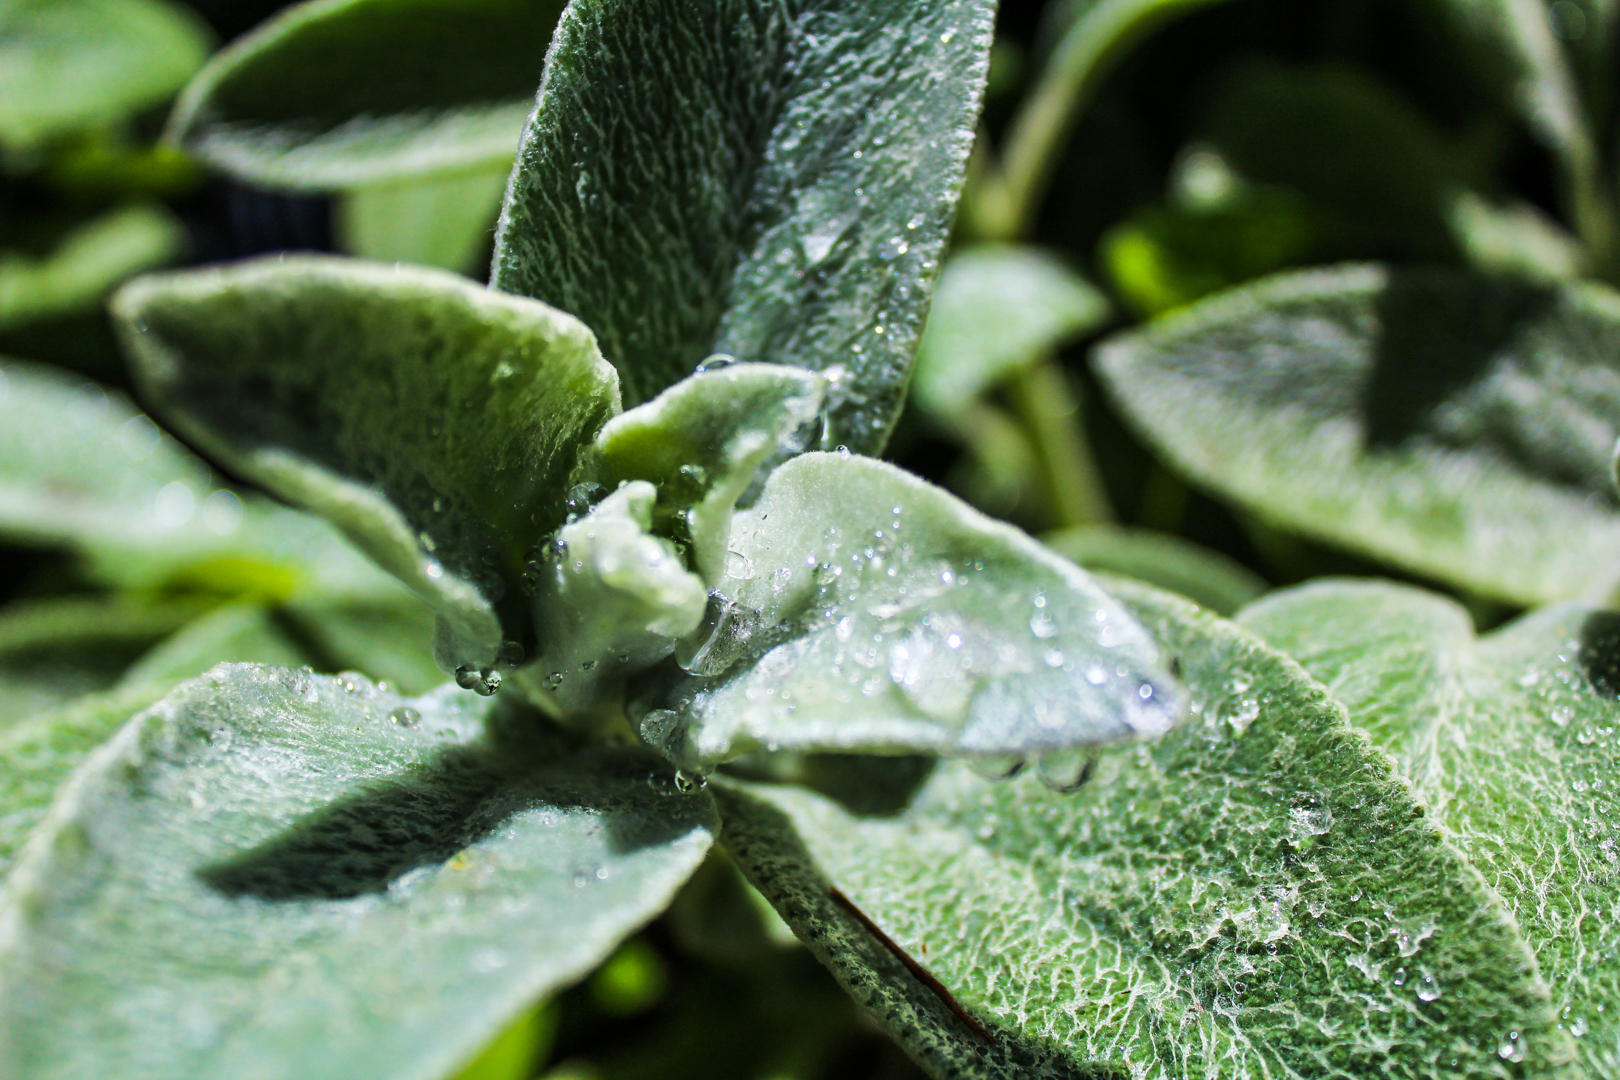
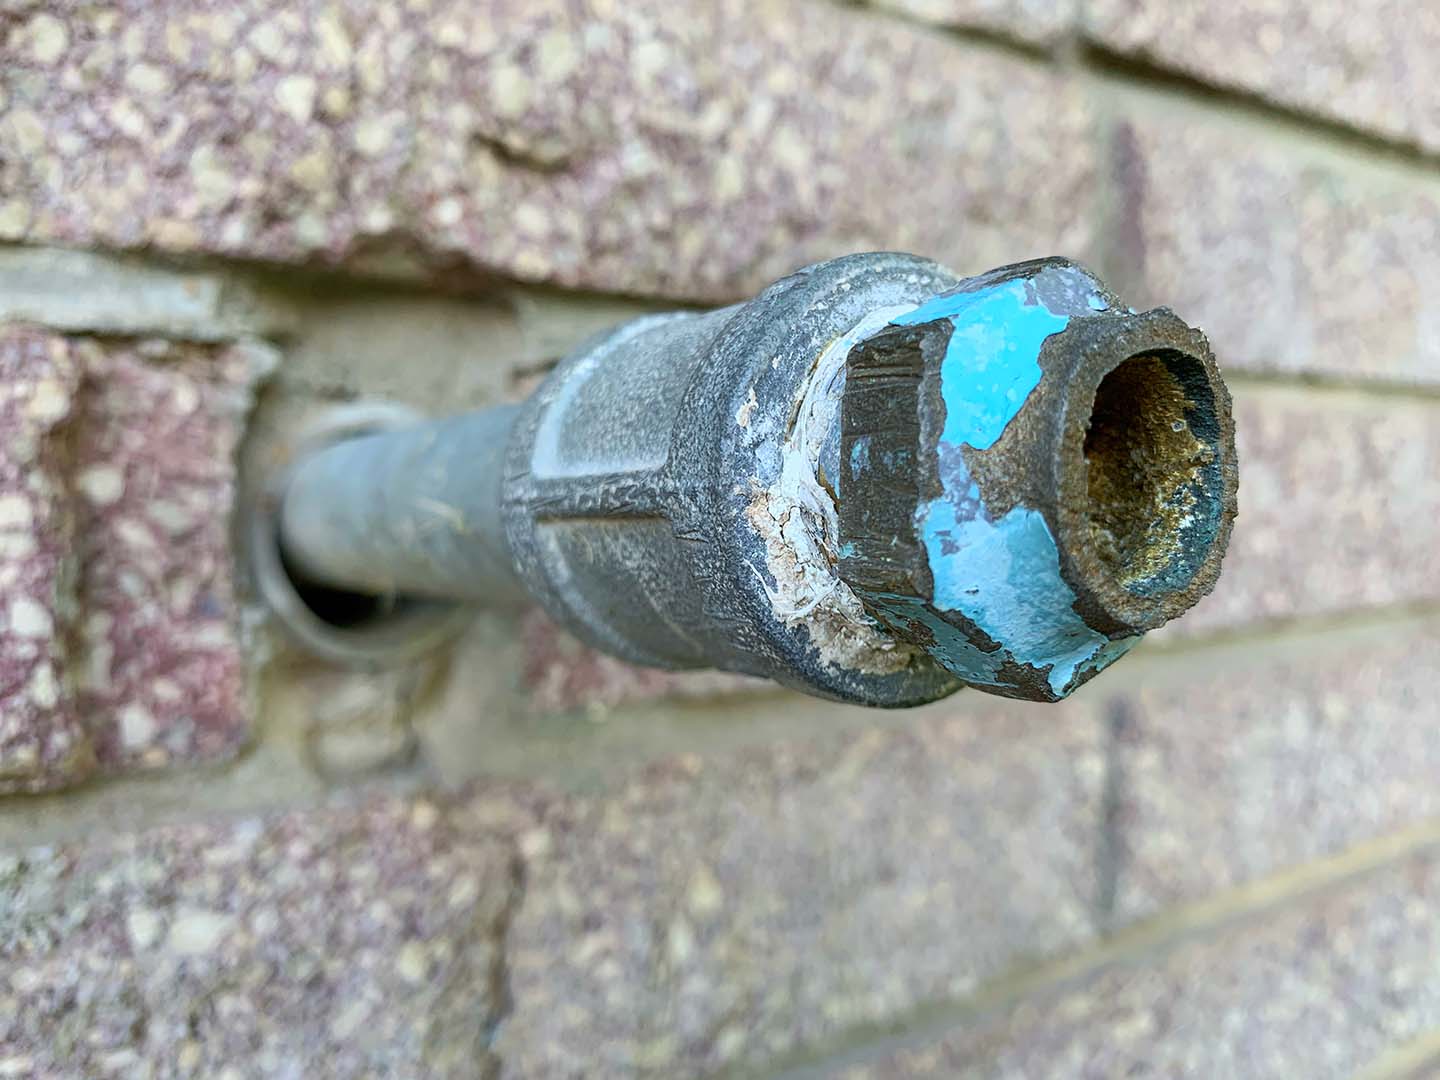
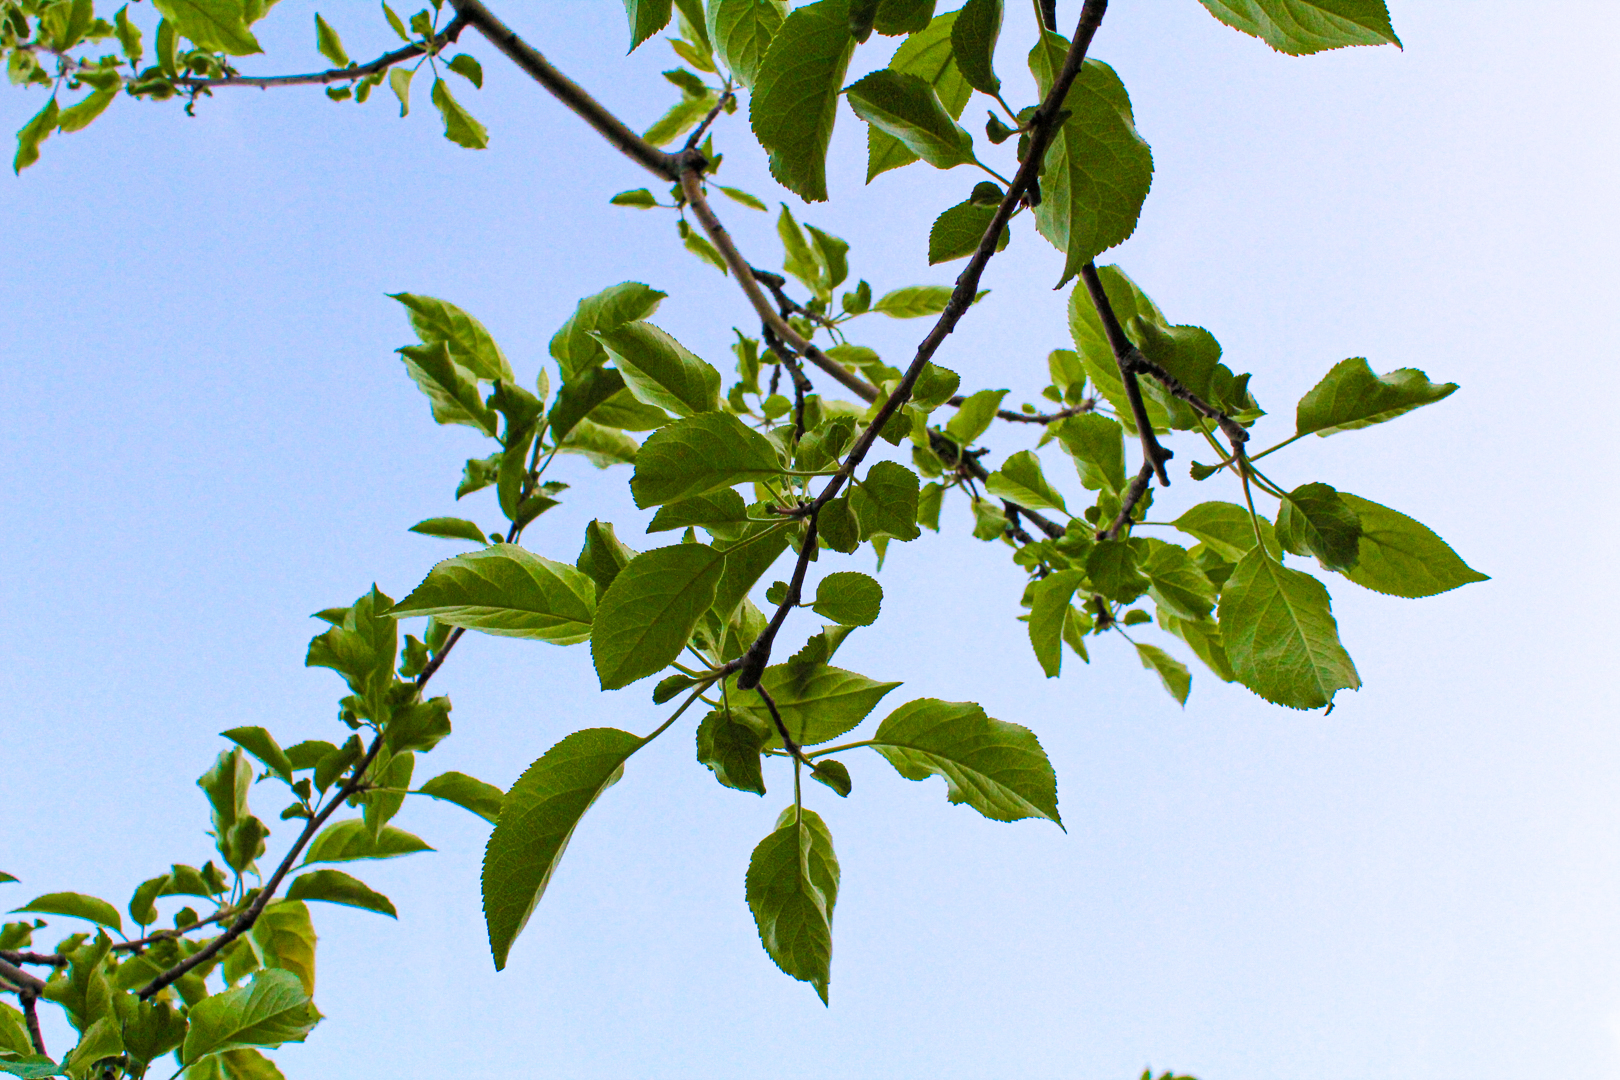
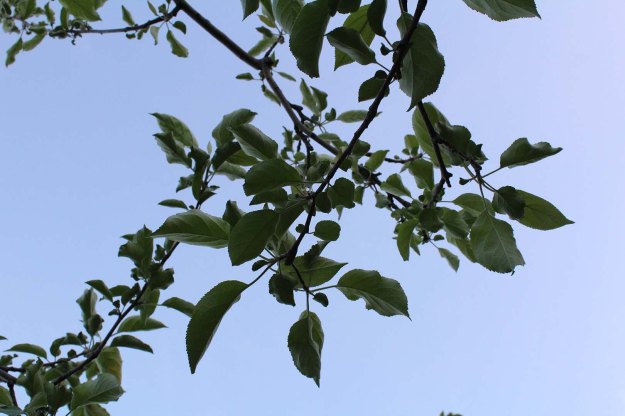
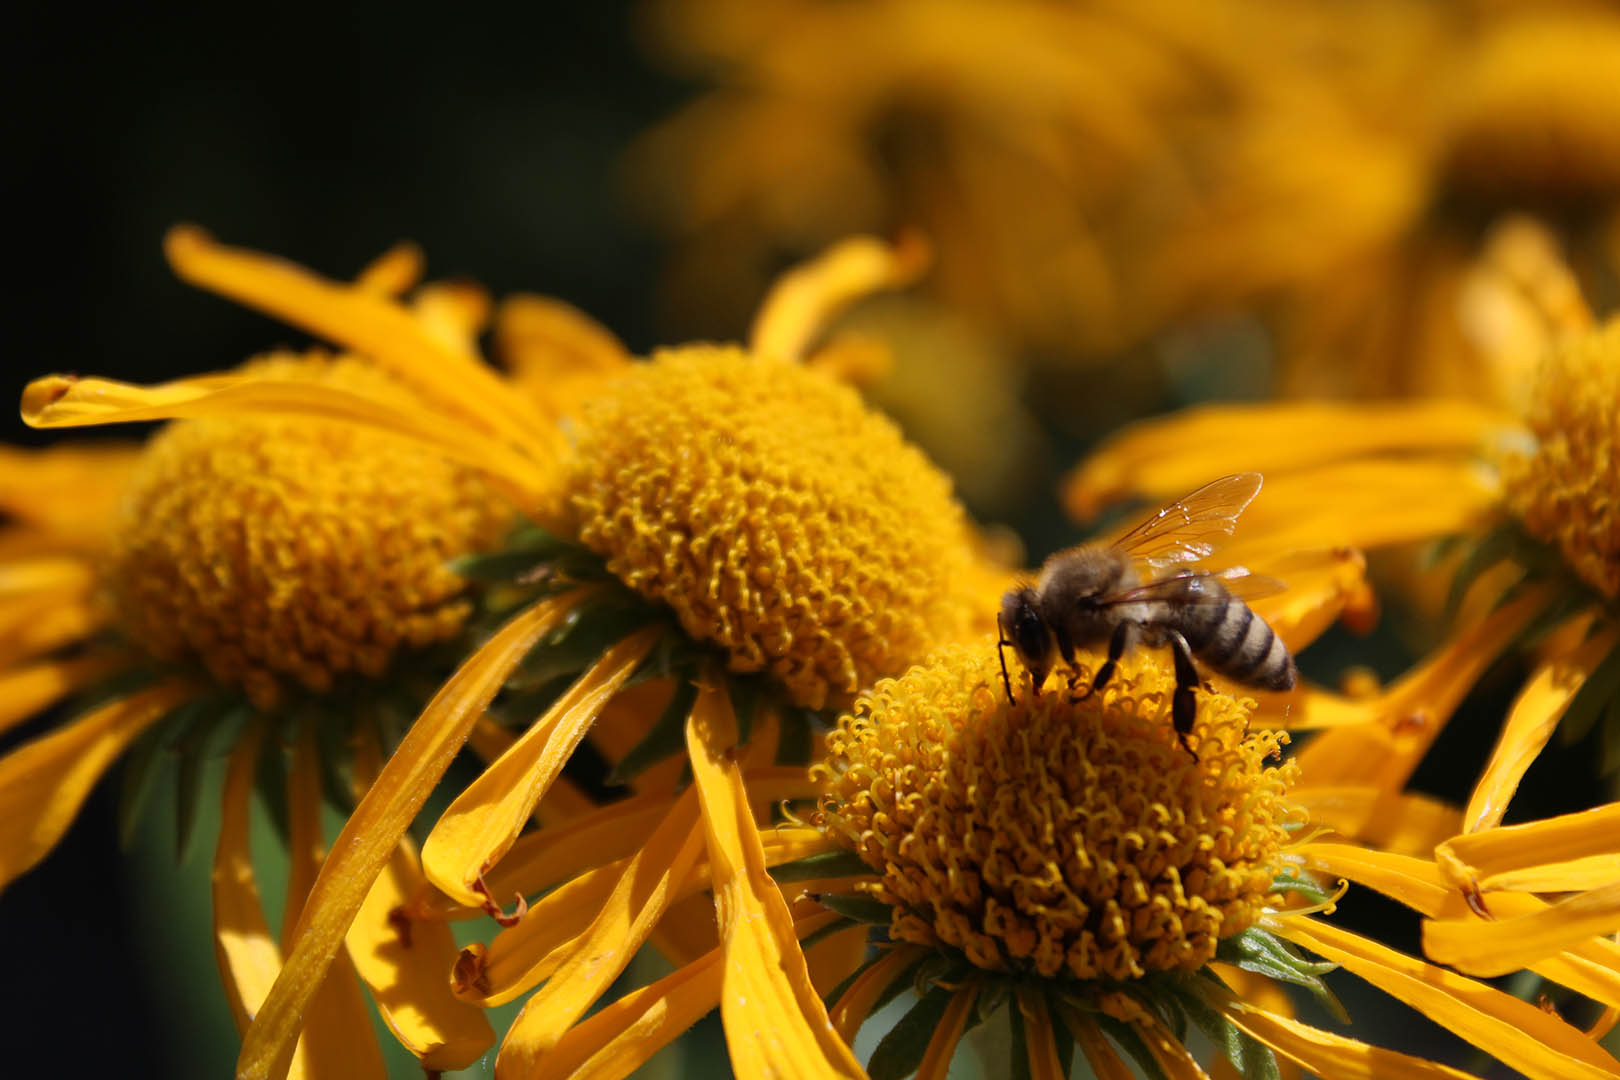
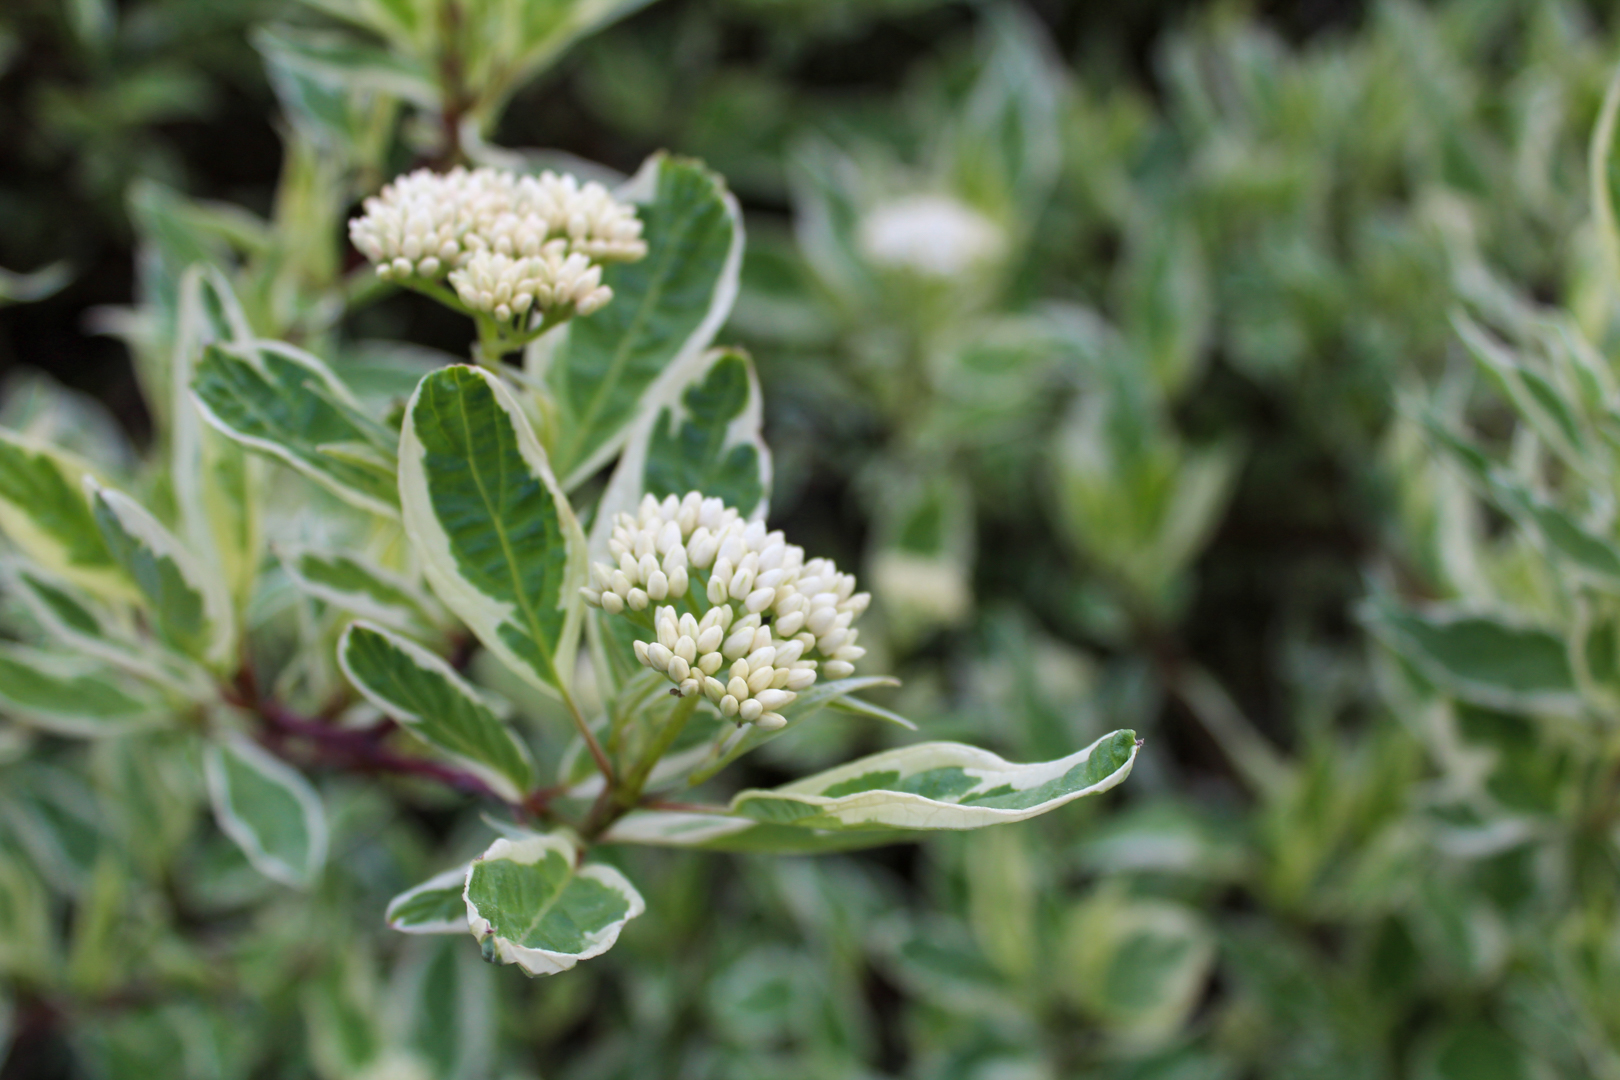
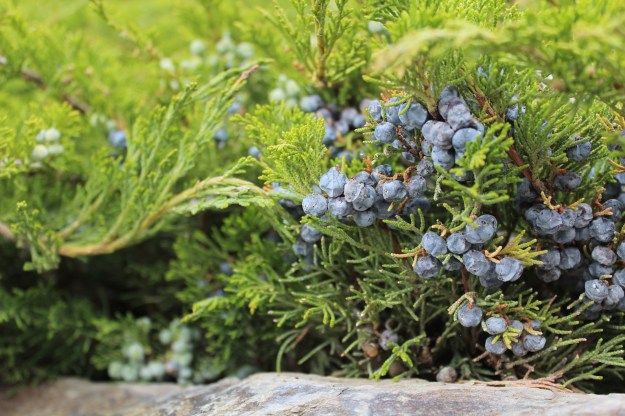
This image was the one I submitted on the Art Drops photo contest entry, this contest only outlined that the image needed to showcase some of our best and most beautiful drops and it could not be in black and white. I chose this contest because I thought that the drops of water were complimented by the green leaves and sunlight and vice verse. I thought that this image would be a great first submission, opening the door for more contests in the future.

For this photo I lightened the image and brought out the green colors a bit more. I also darkened the shadows to provide some contrast and shape in the drops that were scattered about because I didn’t want them to get washed out. I also made sure to make it fit submission requirements by saving the image in the minimum resolution of 700px x 700px.

I submitted my entry on June 16th, 2020, and here is the link to the contest website: https://gurushots.com/.

THE LETTER T:

GROWTH

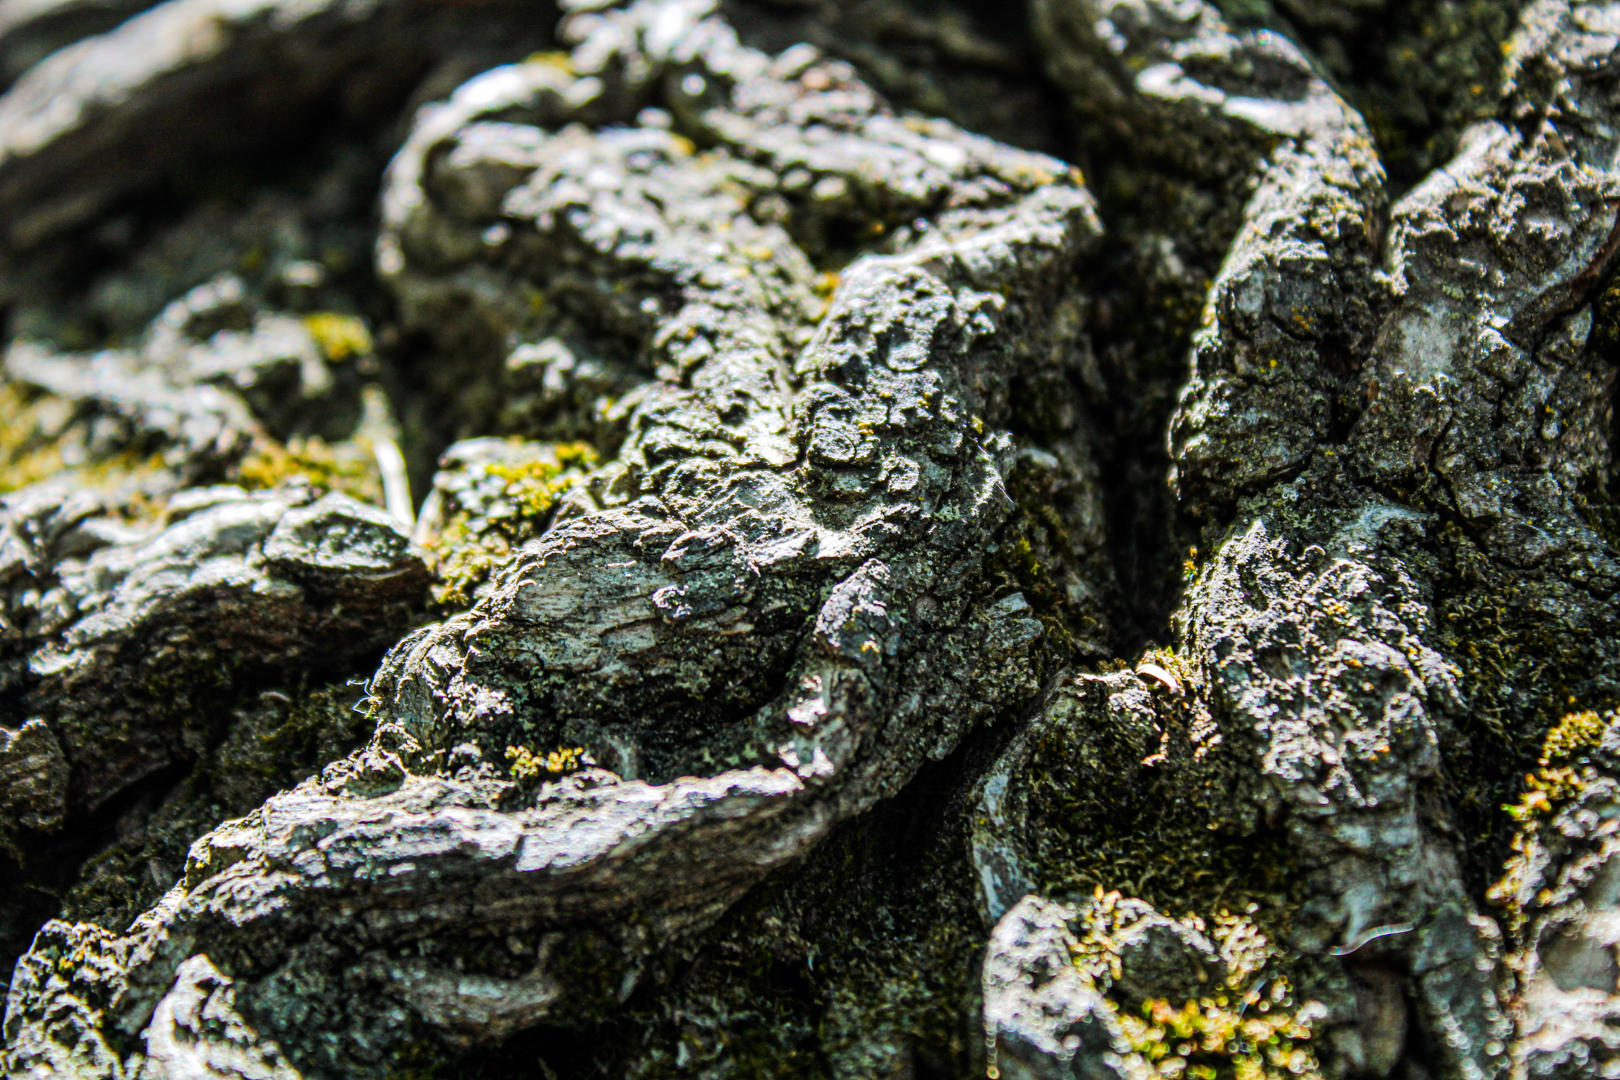
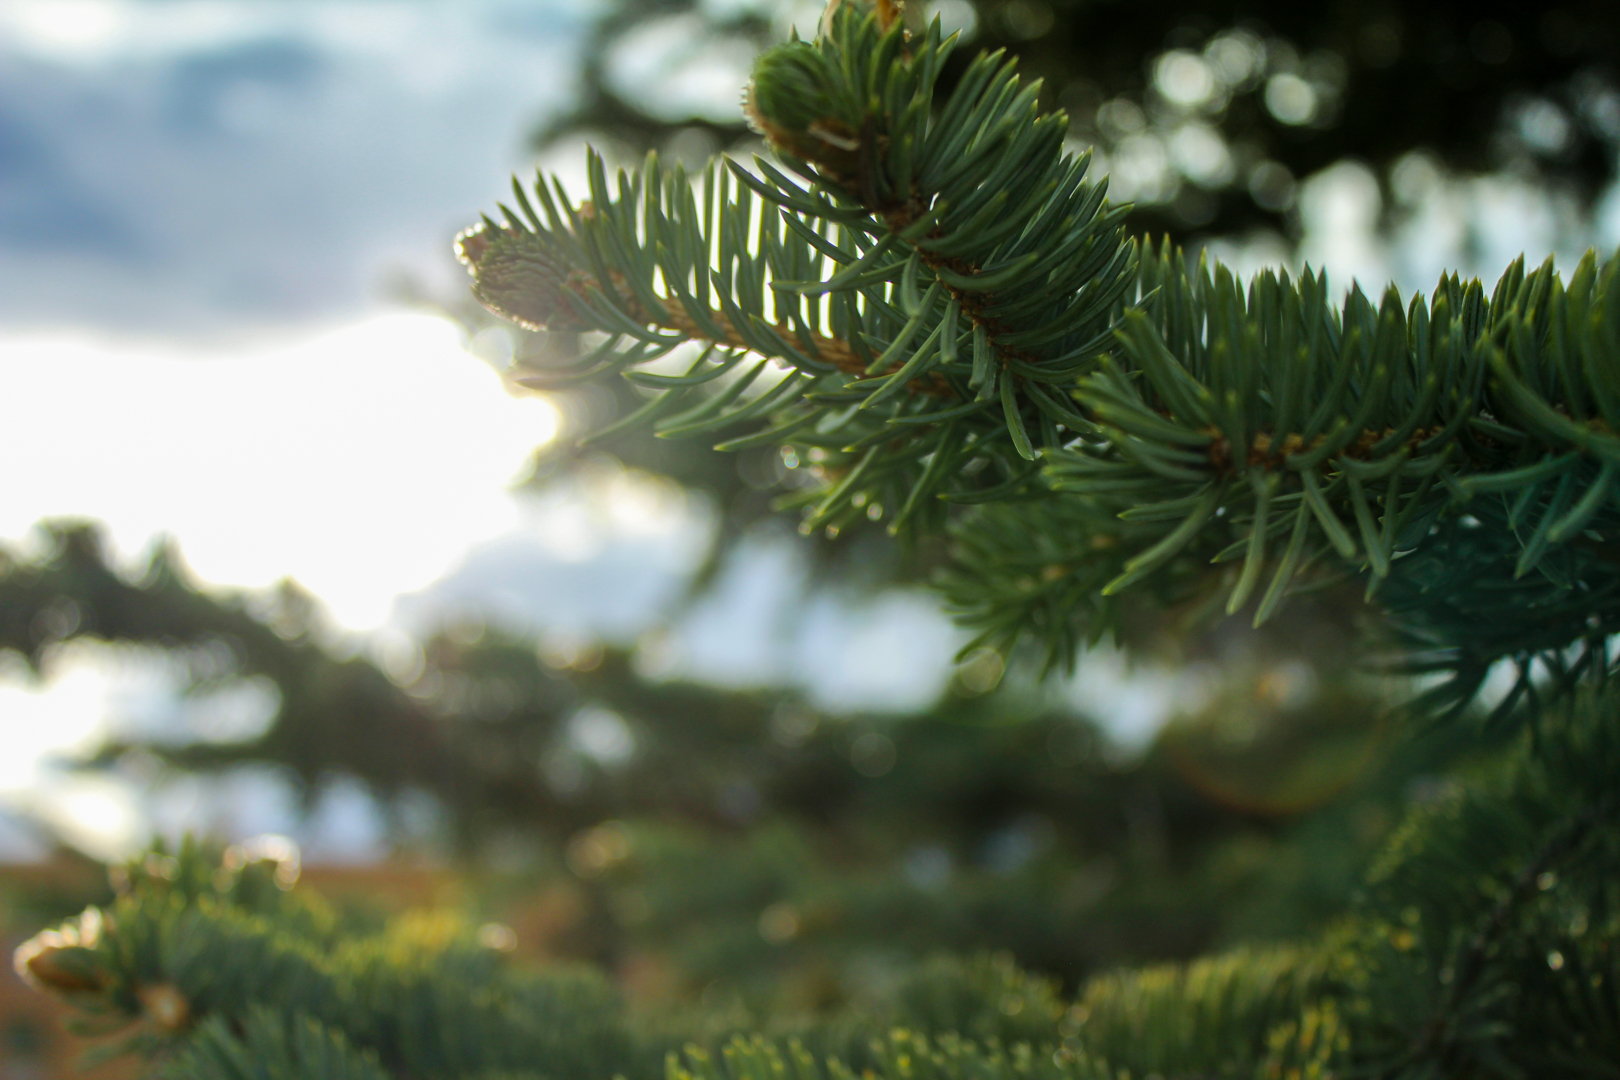
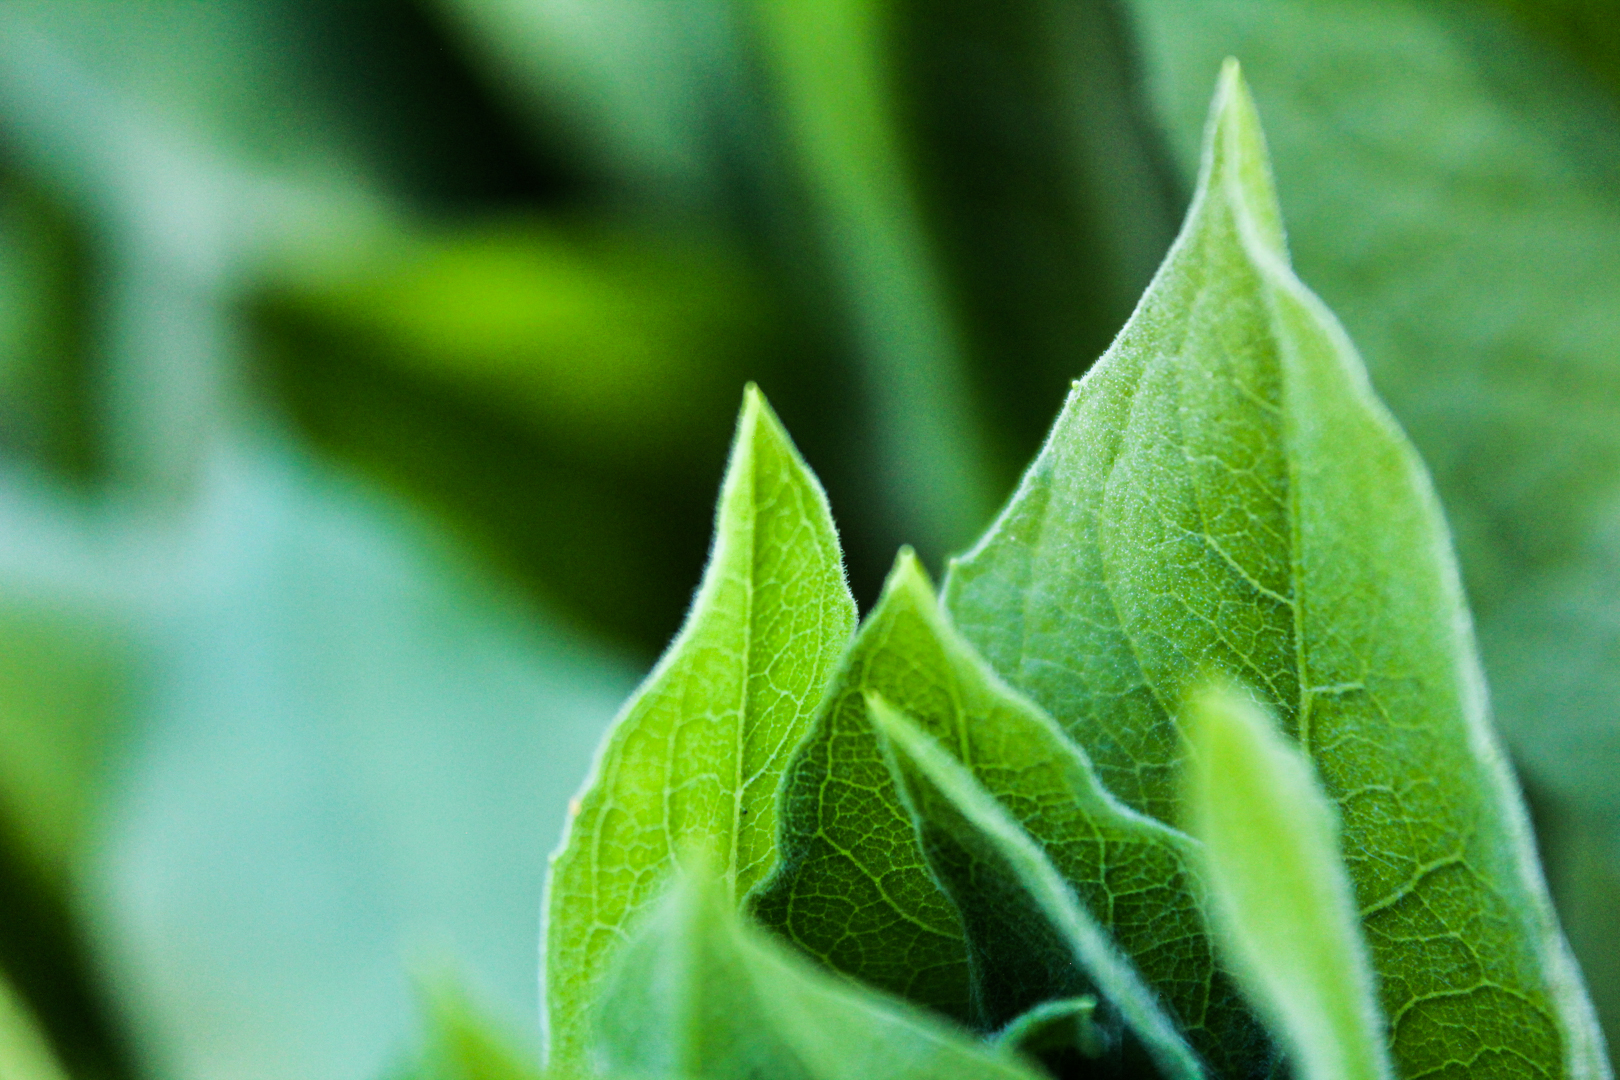
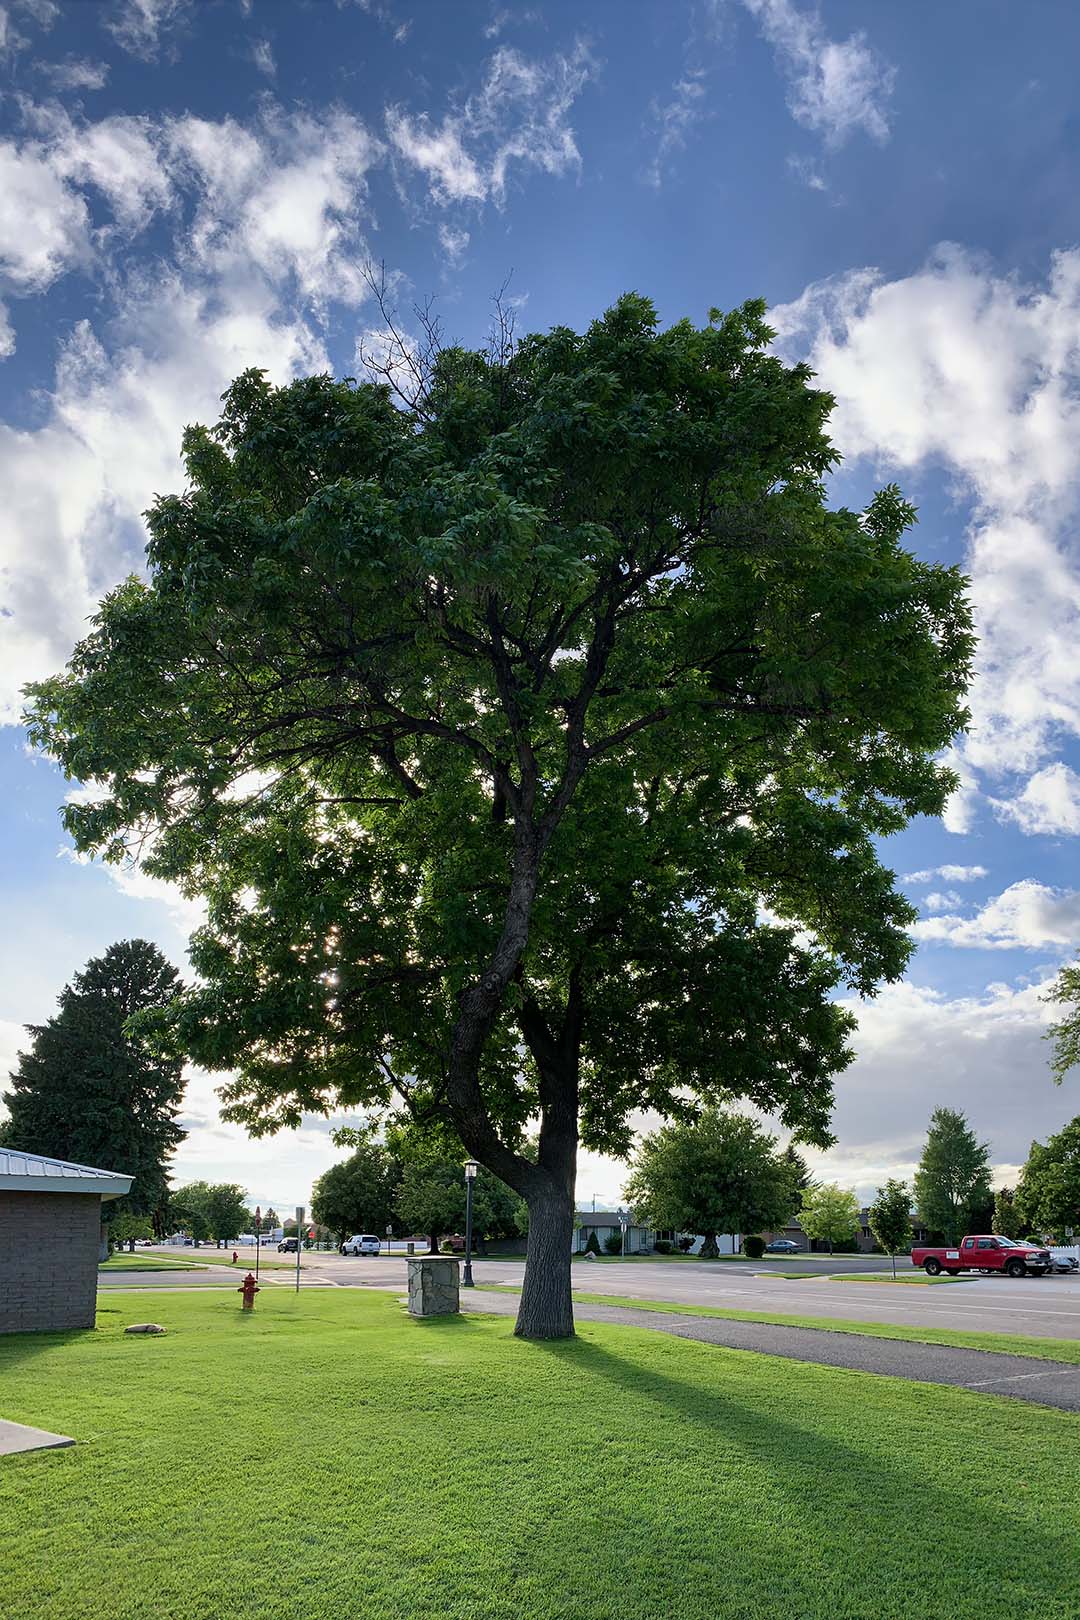
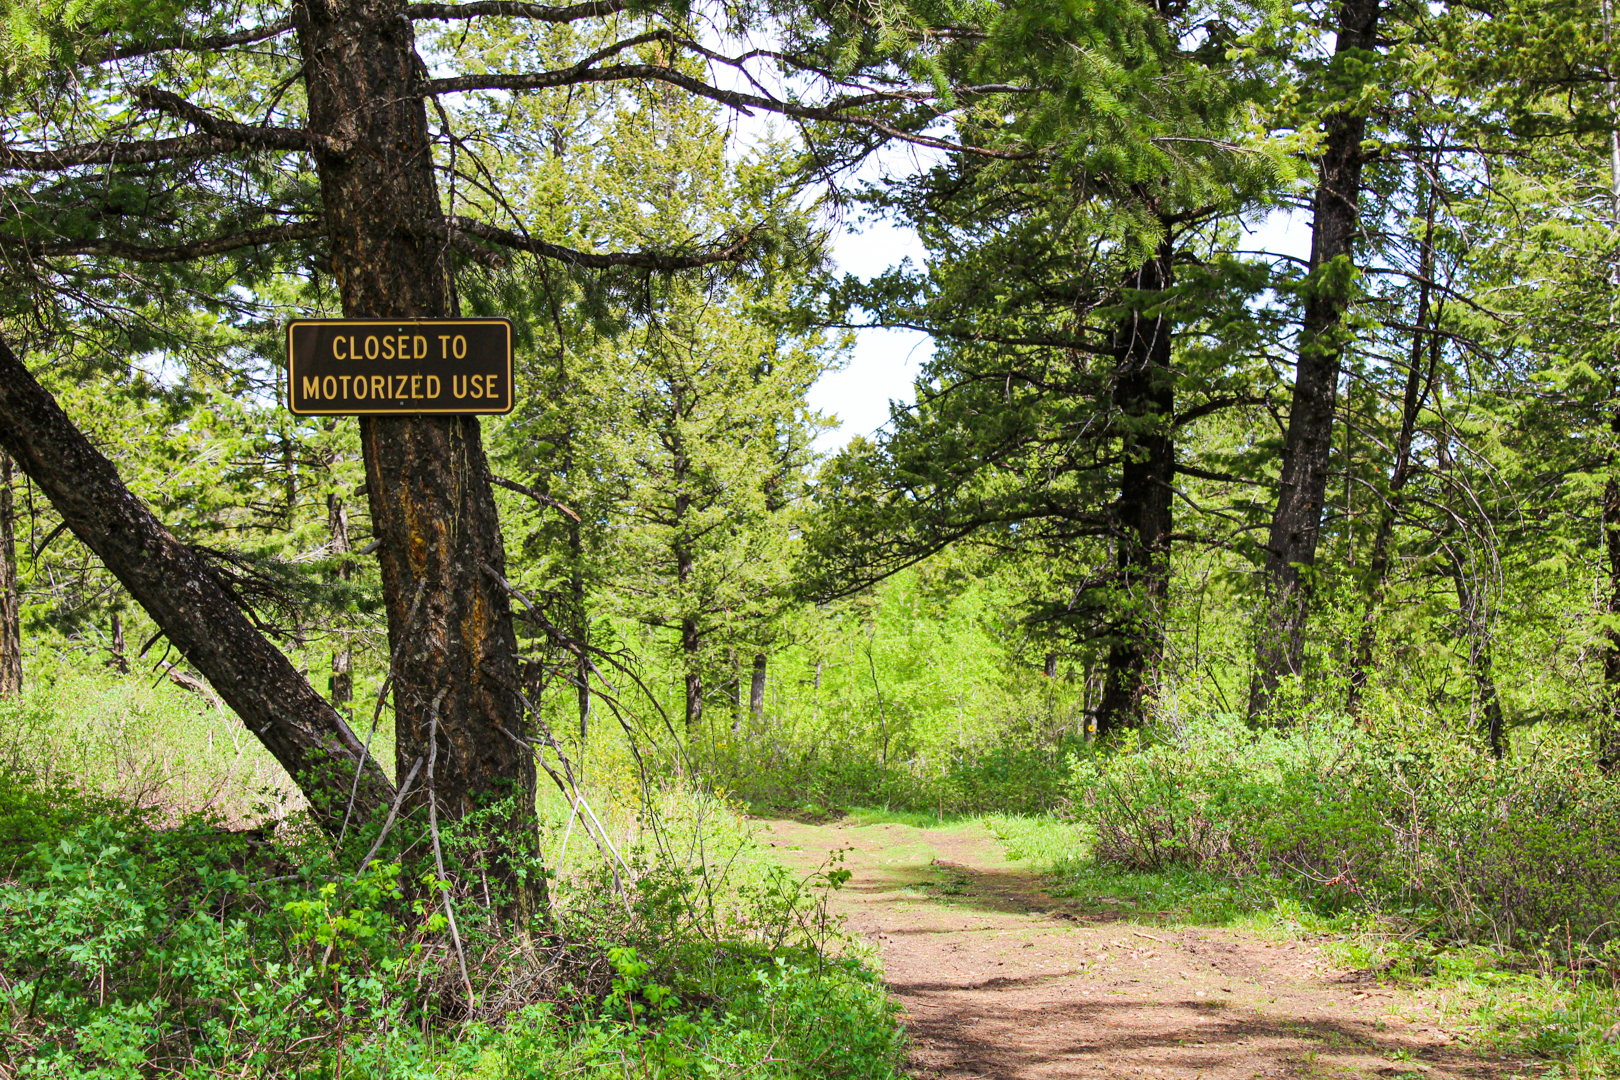
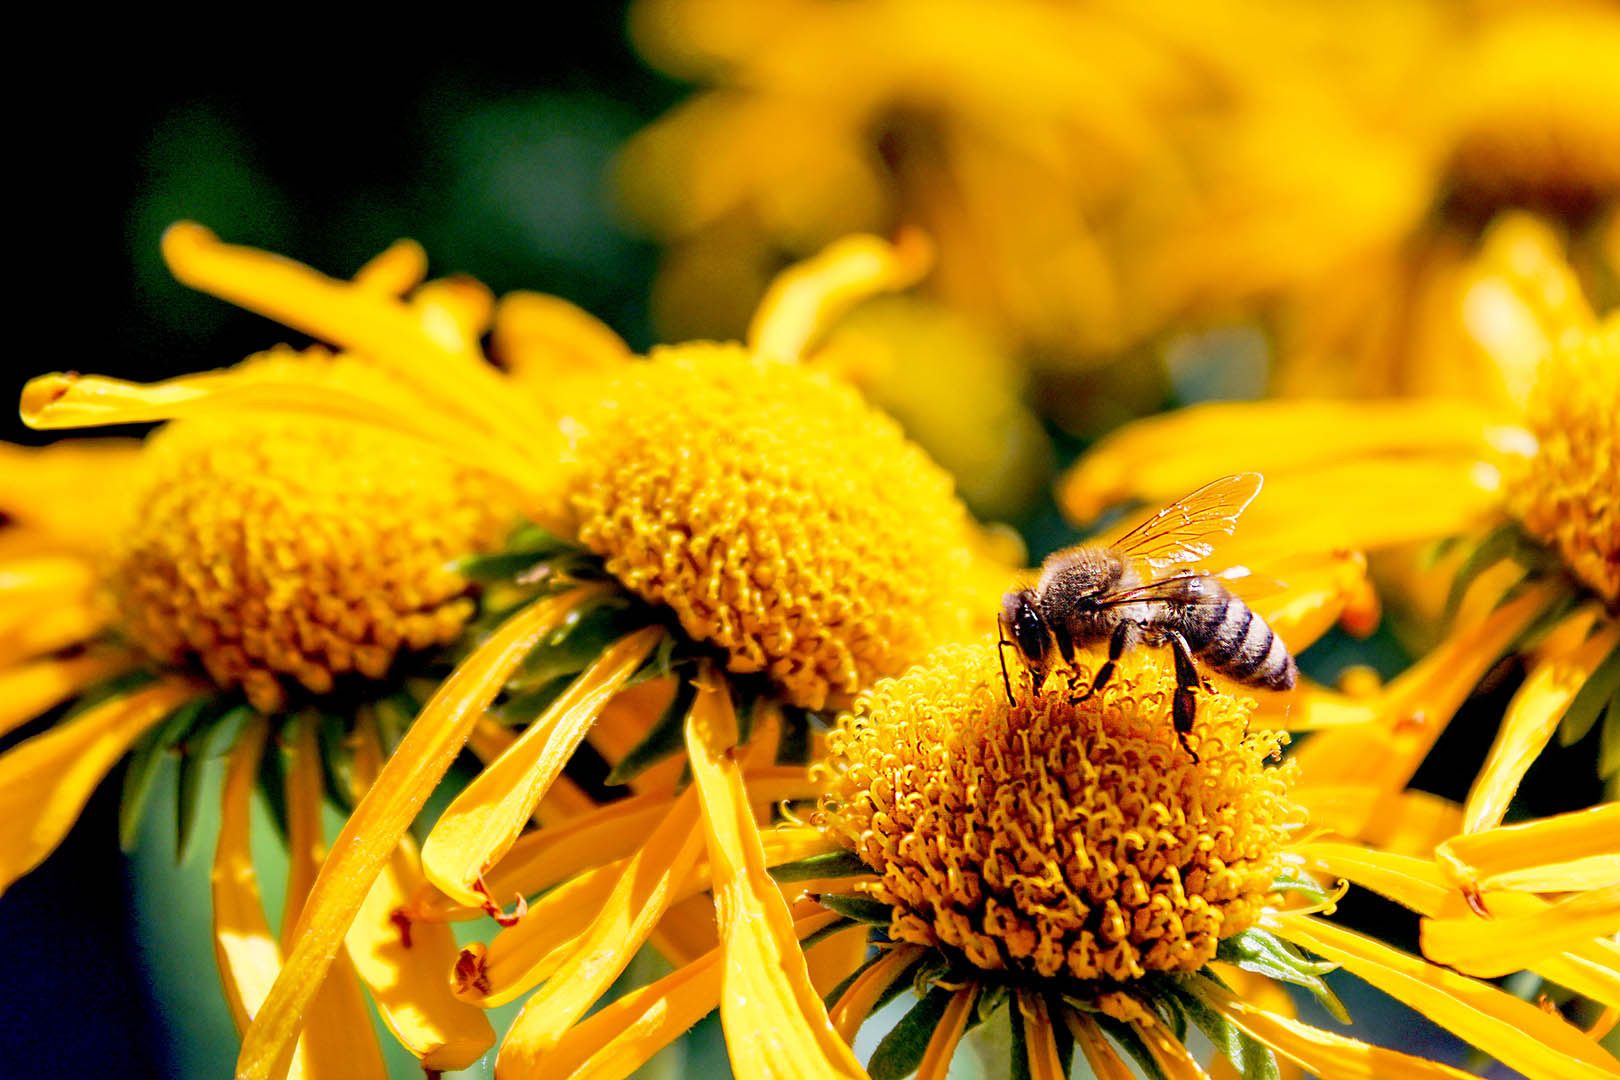
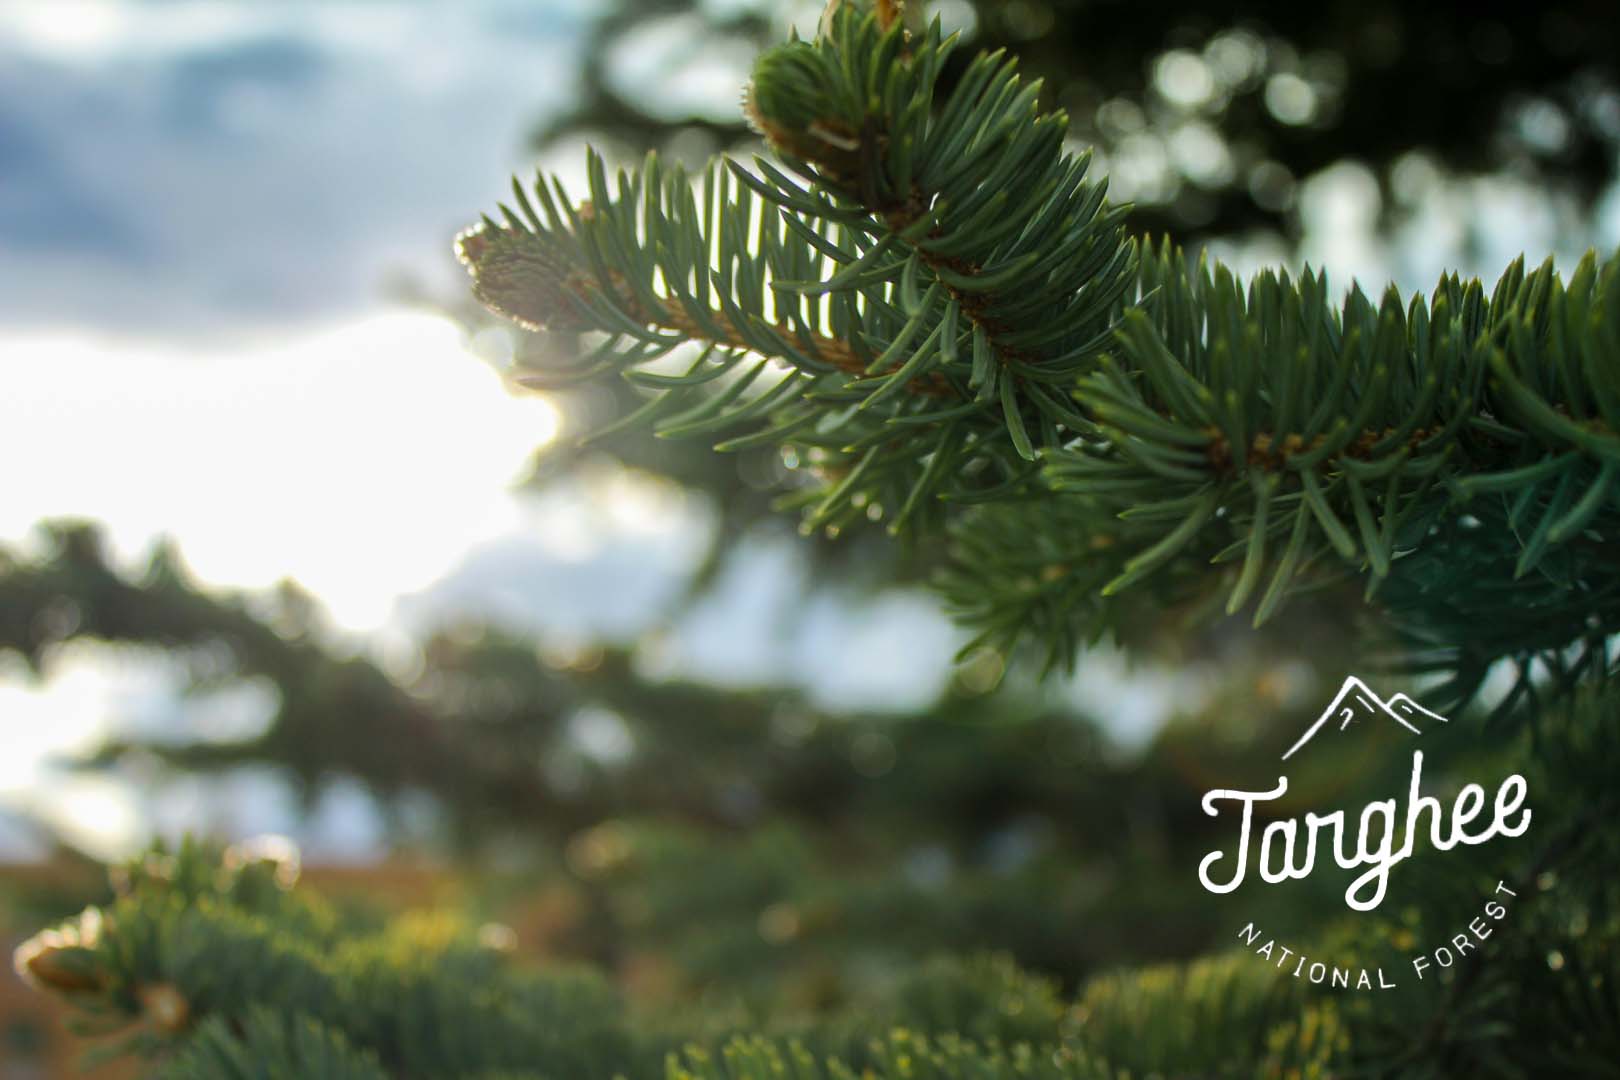
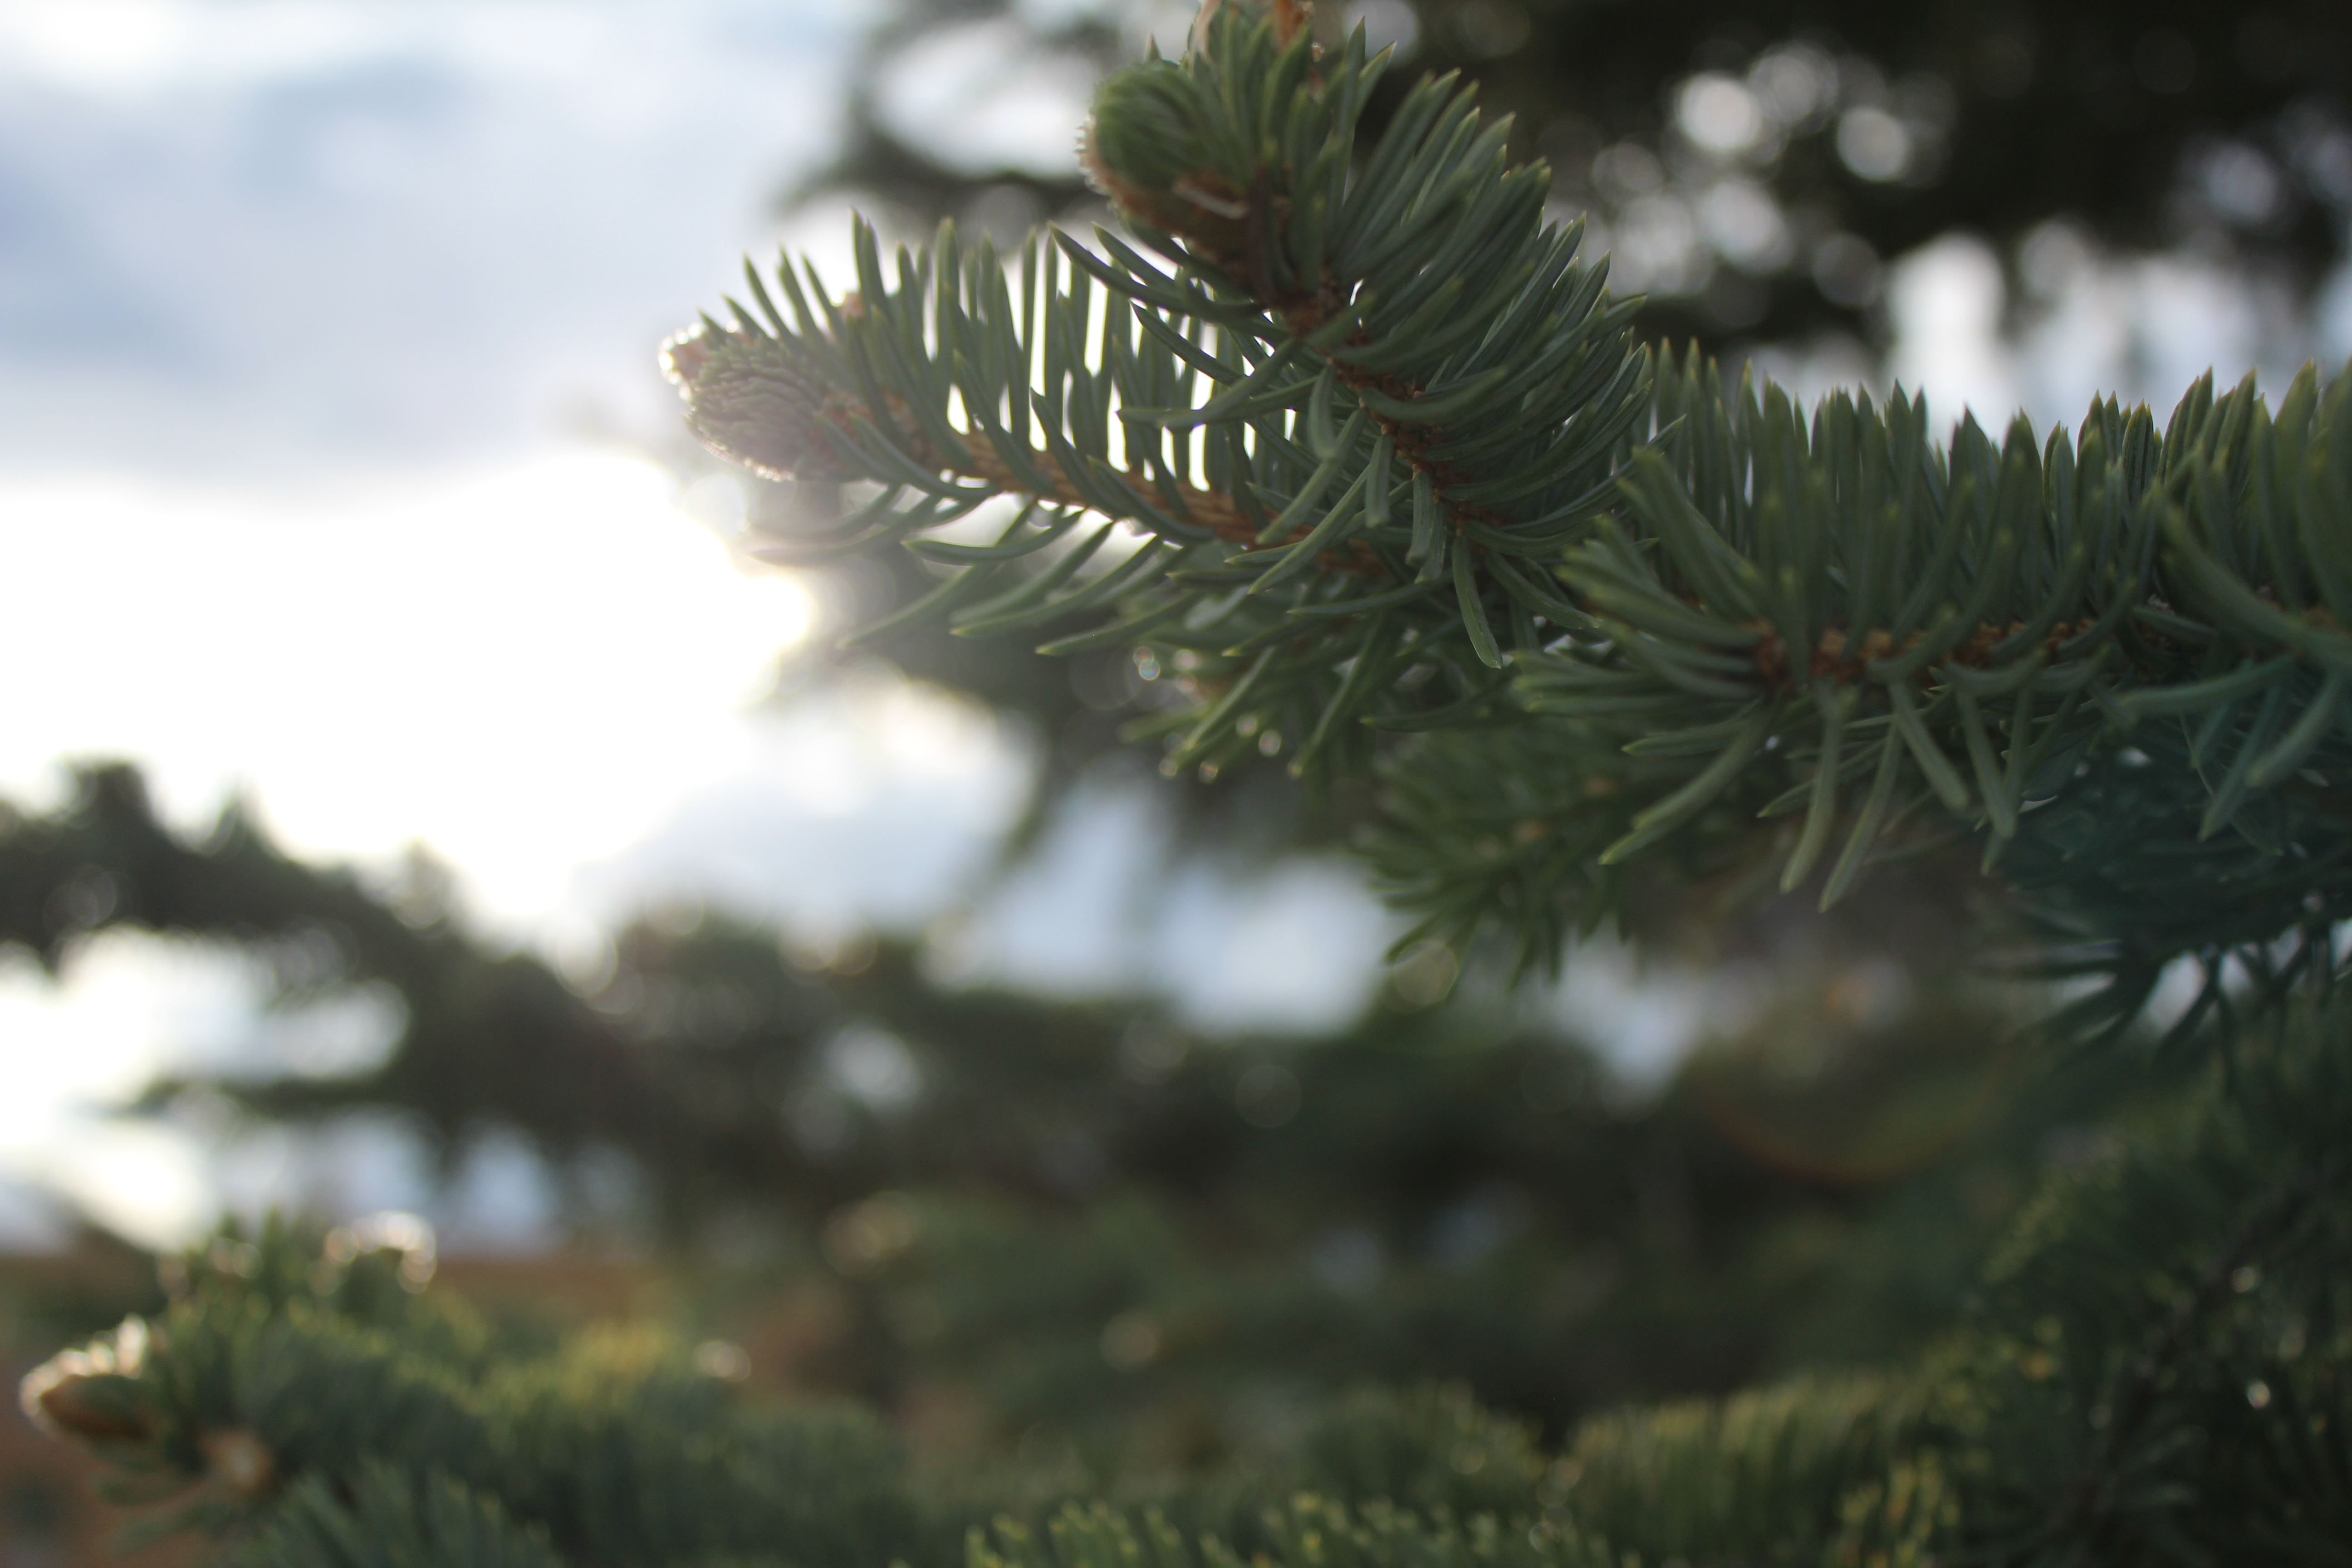
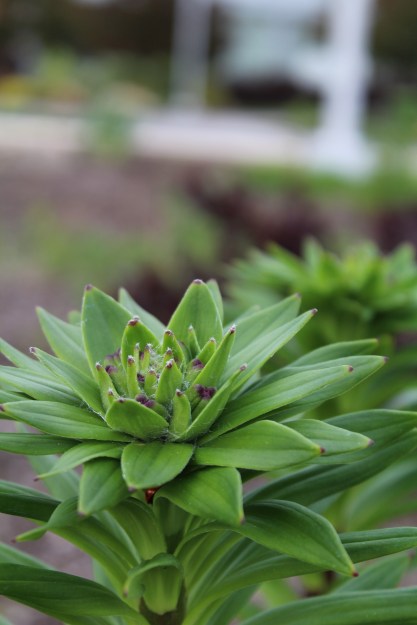
This image was the one I submitted on The Letter T photo contest entry, this contest only outlined that the image needed to be a picture of anything that started with the letter t such as tiger, train, towers, etc. so I did a photo of a TREE. I chose this contest because I thought that it was so fun to pick anything that I wanted to! I loved this macro shot of the tree and its bark, really highlighting the textures we can find in nature.

For this photo, I lightened the image and brought out the green colors a bit more, just like the first image I submitted in the other contest. I also darkened the shadows to provide some contrast and shape in the texture of the bark. By making the colors a bit more vibrant I was able to get a very slight blue tint that helped bring everything together. I also made sure to make it fit submission requirements by saving the image in the minimum resolution of 700px x 700px.

I submitted my entry on June 16th, 2020, and here is the link to the contest website: https://gurushots.com/.

*All photos were taken on my 18-55mm kit lens on my Canon Rebel T5, and all edits done to these photos were done in Adobe Lightroom Classic 2020.

Featured

TOP FIVE PHOTOS

I picked these photos as my top five photos from this semester that I have taken because it shows that I can take photos of a variety of subjects, in a variety of locations, while still being cohesive with my work. I think these photos showcase my strengths of shooting close-up/macro shots with just my 18-55mm kit lens, but also my abilities with editing in post, using mainly Adobe Lightroom. Through these photos I am able to show my abilities in creating bokeh, either through lens compression or aperture, helping to elevate the focus on the subject at hand. Having no experience with photography other than random photos with my phone, I would say that I have gained great skills to help me with a vast spectrum of work such as landscape, close-ups, editing, etc.

*All of these photos are taken from my other blog posts, the captions provide the name of the photo and what blog post they can be found on!

TIP TOE THROUGH THE TULIPS – EXCURSION: SERIES
TARGHEE – EXCURSION: CREATIVE
QUICK SNACK – MACRO PHOTOGRAPHY
LUSCIOUS LEAVES – MACRO PHOTOGRAPHY
FRANSON BEES – MACRO PHOTOGRARPHY
Featured

Macro Photography

For this assignment we were asked to take macro shots of insects, fruits, veggies, flowers, and any objects or textures. I don’t have any macro lens’s but I was able to capture all of my images by using my 18-55mm kit lens on my Canon Rebel T5. I shot all photos with aperture priority on, having very low f-stop, but focusing on my subject but then zooming in all the way. To also maximize my photos, I almost all of them outside, where I could get the greatest amount of sunlight from multiple angles, which allowed me to keep a very low iso of 100.

INSECTS:

FRANSON BEES
QUICK SNACK
AN ANTS ADVENTURE

FRUITS, VEGGIES & FLOWERS:

ROMA
RAIN DROP
SOAKING IN THE SUNLIGHT
LUSCIOUS LEAVES

OBJECTS & TEXTURES:

GROWTH
FOUNDATIONS

*All edits were done in Adobe Lightroom Classic.

Featured

Phone Photography

This week in my digital media class we are learning more about Phone Photography, taking great pictures that can sometimes be even better than our DSLR cameras. I normally use my Canon Rebel T5 camera but this week I got to use my Apple iPhone XS Max. All edits done to these photos were done directly on my phone using the Snapseed app. Here is a helpful/quick YouTube video tutorial/walkthrough of the app: https://www.youtube.com/watch?v=nTAaN3-Nf1g.

Also, check out my Instagram post to see my photos: https://www.instagram.com/p/CBPXei4nQ1J/

PANORAMA:

This is a vertical panorama that I took, and it is an original photo with no edits. I wanted to capture some neat shadows and vibrant aspects by angling the sun behind the tree.

SMITH TREE

FLAT LAY:

I wanted to create a flat lay that told part of my story, I love art, graphic design and visual communication. I think that art is a great way to tell anyone’s story, which can be shown in various mediums.

TELL YOUR STORY

POINT OF VIEW:

For this point of view shot, I took an ordinary shot of this building wall but then found some new close-up angles to turn it into an extraordinary shot. I couldn’t decide which photo I liked more, so I posted two extraordinary shots!

ORDINARY
EXTRAORDINARY ONE
EXTRAORDINARY TWO

SHALLOW DEPTH:

The first image shows a normal shot that your phone can take of a person, but the second photo shows the same image taken with portrait mode on. Meaning that the background is blurred creating bokeh, and helps focus on your subject more clearly creating focal point.

ORIGNIAL
PORTRAIT
Featured

Excursion – Fine Art

For this part of my excursion, we were asked to capture five or more fine art photos such as Landscape, Nature, Wildlife, Architectural, and Close-ups. Since I was camping in Caribou-Targhee National Forest during this excursion I wanted to keep my photos in the nature theme again. But I was also able to capture some photos on the way home to Rexburg as well! For my photos, I was able to find my landscapes and close-ups and a few architectural elements through the fencing posts. In post I was able to edit all of my photos in Adobe Lightroom, nothing drastic, just bringing out the vibrant colors and subtle textures.

FINE ART PHOTOS:

THE HIKE
HIDDEN TREASURE
WALKING ONLY
POWER OF X
IDAHO LILAC
REACH FOR THE SKY

ORIGINAL PHOTOS:

Featured

Excursion: Portraits

OUTDOOR:

For my outdoor portraits I took these photos at my complex’s fire-pit over Memorial Day weekend. I am still learning how to take photos of people so I wanted to make it more casual which fits my kind of lifestyle more. I used a fairly low iso considering how dark it actually was outside, but I loved how the sky turned out, complementing the skin tones.

TURNERS
MARTY

GROUP:

Again, I went for a more casual feel for my group portraits because I love capturing moments with friends and other activities. To set the mood, I opted for very bright tones and again a more blue sky.

KARIE ANNE’S

INDOOR:

For these indoor portraits, I used a slightly higher ISO because the lighting within the room. I posed the people to the side because I wanted to try some new angles compared to my other shots.

KASS
MARTY 2,0

ORIGINAL PHOTOS:

Featured

Depth: Deep and Shallow

DEEP DEPTH:

– BACK ALLEY: For this image I wanted to shoot some older buildings around Rexburg, ID but opted for the backside of them. Even though it was cloudy outside I was still able to use a lower ISO of 200 because I utilized my tripod. In post, I brought out the colors of the paint and the bricks in Adobe Lightroom.

BACK ALLEY

Back Alley – 05-12-20, 6pm, Rexburg – 35mm – F/18 – 1/30 – Canon Rebel T5 – Tripod

– REXBURG ART: I had seen this wall in Rexburg, ID before but thought it would be a great idea to shoot it for this assignment. I used a tripod while taking this photo as well, which again helped me to keep a lower ISO at 200. In post, I brought out the colors of the paint, and slightly darkened the sky so it wasn’t so washed out and too bright.

REXBURG ART

Rexburg Art – 05-12-20, 6pm, Rexburg – 35mm – F/18 – 1/60 – Canon Rebel T5 – Tripod

SHALLOW DEPTH:

-PV: This is a photo of a guitar tube amp taken in my apartment. I wanted to experiment with using an object/subject that can be in focus and part of it out of focus. I think that having the focus fade out helped elevate the volume knob. In post, I changed the temperature to a warm color in Adobe Lightroom.

PV

PV – 05-12-20, 5pm, Rexburg – 35mm – F/4.5 – 1/100 – Canon Rebel T5

– PRAY: I thought this had an interesting angle because the frames were on two separate walls, which also had contrast in light and color. This helped the frame that was in focus stand out more. In post, I lightened the white and made it a warmer tone in Adobe Lightroom.

PRAY

Pray – 05-12-20, 4pm, Rexburg – 35mm – F/4.5  – 1/80 – Canon Rebel T5

Featured

Motion: Freeze and Blur

FROZEN MOTION:

– SOUND CAPTURED: For this image I wanted to try something a little different so I used a china cymbal and placed chalk on the top of it. In order to capture this image I needed a tripod, a fast shutter speed, and a wide aperture. I then had my husband hit the cymbal causing the chalk to fly off of the cymbal in every direction. In post, I cropped the image to eliminate any unnecessary background objects and then enhanced my whites to make the chalk stand out more.

Sound Captured: 05-04-20; 7pm; Rexburg-Porter Park; FL: 35mm; f/4.5; 1/500; Canon Rebel T5 – Tripod

– 45 DEGREE ANGLE: While capturing this image I had a hard time keeping my ISO low due to lighting but I was able to find the angle of this spinning ring that I was hoping for. To create this image I used a fairly fast shutter speed. In post, I darkened the shadows but increased my clarity and texture so the ring would stand out more.

45 Degree Angle: 05-05-20; 9pm; Rexburg – Providence Square; FL: 35mm; f/2.0; 1/250; Canon Rebel T5

BLURRED MOTION:

– LEADING LIGHT: When taking this image I wanted to experiment with a smaller and more focused light source, so I used a lighter but then stood in front of a mirror which helped caused to streaks of light. In order to keep the light in the shot longer I used a slow shutter speed of 1/4. In post I darkened the shadows to help keep more of the focus on the light.

Leading Light: 05-05-20; 8pm; Rexburg-Providence Square; FL: 35mm; f/4.5; 1/4; Canon Rebel T5 – Tripod

– BLURRED RINGS: In this image I used the ring again but instead made it blurry this time. Again, I was struggling with my lighting so I used a higher ISO but compensated for it by keeping my camera stable on the table. In order to get the blur like I had hoped, I used a slower shutter speed of 1/5 and a wider aperture of f/2.8. In post, I made the colors warmer to help make the ring feel more apparent.

Blurred Rings: 05-05-20; 9pm; Rexburg-Providence Square; FL: 35mm; f/2.8; 1/5; Canon Rebel T5

Featured

SME – Aperture and Shutter Speed

A Study in Aperture and Shutter Speed: This post will be demonstrating my research, study and findings on the topics of aperture and shutter speed that includes photographic examples of each point. Then followed by some info about a photography or editing topic that interests me to explore more about. Enjoy!

WIDE APERTURE:

Photo by Maizal Najmi from Pexels

Through my research I was able to learn more about the topic of wide aperture. When we have a wide aperture that means that our “f-stop” is a larger fraction such as f/2 or think of it as 1/2. Meaning that our lens is only opening 1/2 of the way, this allows for a greater quantity of light flooding into the lens of your camera. Therefore, producing a more shallow depth of field. As we gather more light by having a wider aperture this causes a smaller area of focus and creating a bokeh (background blur). This technique is great for close up shots and creating focal points.

NARROW APERTURE:

Photo by Mark Neal from Pexels

Now that we have learned about one part of aperture, the wide aperture, we will now focus on the other aspect, narrow aperture. When we have narrow aperture that means that our “f-stop” is a smaller fraction like f/16 or f/22, meaning the lens of our camera is only opening a 1/16 or 1/22 of the way, creating a very small opening. By having a small opening in our lens we cannot have the same amount of light reach the lens as if it was all the way open or even half of the way. With this smaller amount of light allotted, we can have a larger area in focus in our image, where everything is sharp. This technique works best for shots like landscapes or even city streets like featured above.

FAST SHUTTER SPEED:

Photo by Zachary DeBottis from Pexels

Fast shutter speed is also known as “Frozen Motion”. Shutter speed actually refers to how long your lens stays open when taking a photo on your camera and is also measured by fractions just like aperture, so something like 1/x equals the speed at which the shutter curtain will open and close. For example anything around 1/500 will open and close the shutter curtain very quickly, and by setting it to this speed you can capture moving objects or people as if they were frozen. Something to keep in mind is that since the shutter curtain is moving at such a high speed very little light is able to be gathered by the lens, so you will need plenty of light around you. Another thing to note is that since you are at a faster shutter speed, tripods are not always necessary for the shot.

SLOW SHUTTER SPEED:

Photo by Ali atiabi from Pexels

Just like the name, slow shutter speed is the exact opposite of fast shutter speed. Slow shutter speed is also known as blurred motion. Unlike the fast shutter speed we want our fraction to be much larger such as 1/60 or anything less than that, because that means our lens will be shutting at the speed of 1/60 of a second rather than 1/500 of a second. In our images we want to make sure that our subjects that are moving are blurred but anything else such as the background or surrounding objects to be still, so be sure to use a tripod to reduce any shaking. Since our lens will be opened for longer we have to take into account the large quantity of light captured, to avoid your image from being overexposed try shooting in darker areas or darker times of the day.

PHOTOGRAPHY OR EDITING TOPIC I AM INTERESTED IN – BRACKETING:

Photo by Josh Hild from Pexels

After doing some research and browsing around a topic that stood out to me that I want to learn about and put into use is bracketing. Bracketing involves in camera (the photography stage) and in post (the editing stage), this technique allows you to find the right exposure for your image. Generally you take 3 photos (sometimes 4), one is underexposed, the next is normal exposed and then one overexposed. The exposure can be changed by changing your shutter speed to accommodate the amount of light. Then with these three images you can pick and choose which parts of the 3 images you want to blend, this can be done using photoshop.

Fine Art Print: McKenna Pro

This past week I had the opportunity to pick the top image I had shot from this semester, that was submitted to be printed on a 16×24 large print. The image that I chose was from my macro assignment where I shot a picture of a bee on some yellow flowers at the Thomas E. Ricks Gardens on the BYU-I campus!

ORIGINAL:

EDITED:

To edit this image to be ready for a large print I made sure that I didn’t need to crop in much so that I didn’t lose pixels that would be needed for the image to be scaled up to such a large size. As for the colors, I increased the highlights only slightly and lightened the shadows so it wouldn’t be too dark in print. I know that McKenna Pro prints slightly warmer so I tried adding some more blue tints rather than more yellow. Also, I used Photoshop to sharpen the bee and the flower it is on to help strengthen it as the focal point and so it wouldn’t look blurry in the print. Overall I wanted to make sure the image was bright enough that it didn’t print too dark.

When I went to order my print from McKenna Pro it felt seamless! Their software and ordering process is so easy to use. The specific print that I ordered was a photographic, metallic, 16×24 print, with mount and styrene. My confirmation email is below:

Excursion: Creative

LEVITATION:

For this image I took a picture of the background and then had my friend hold a burning roasting stick, I was able to crop out some of the stick in Adobe Photoshop to making it look like the stick was floating in mid air.

Floating Fire

ABSTRACT:

For this photo I wanted to try out more texture blending like we learned in class not too long ago. In the photo the target already had bullet marks on it, but it was very dark. So I though by adding a new texture that it would add some more color within and show that it is more old and weathered rather than shot at.

Lone Target

COMMERCIAL:

For part of my photo excursion I went to Targhee National Forest, and I loved taking pictures of some of the trees. I chose this photo because I wanted to highlight going to the forest and enjoying what nature has to offer, then included a logo rendition of Targhee.

Targhee

CONCEPTUAL:

For this conceptual photo, I again wanted something involving nature as I was outdoors for my excursion. In the photo it shows how we can be one with nature without taking away from the beauty of the earth.

Nature’s Victory

ORIGINAL PHOTOS/OTHER EDITS:

SIDE NOTES:

For all of these photos, they were first edited in Adobe Lightroom and then brought into Adobe Photoshop to add the logo, add texture, and image masks.

Excursion: Series

SUBJECT & PROCESS:

For this series I decided to have my subject be plants because I loved that there was a vast variety of them on the Brigham Young University – Idaho campus during the springtime. For the majority of my photos I wanted to do close-up shots of the subjects and create bokeh to help focus on the subject more. For my camera settings I used aperture priority (AV) on my Canon Rebel T5 and mainly kept my ISO around 100 because I had plenty of sunlight right before sunset. I also made all adjustments in post in Adobe Lightroom Classic.

ORIGINAL PHOTOS:

Landscape Perspective

For this assignment we need to pick a subject and take multiple shots that have a variety of angles, close ups, landscapes, one humanizing aspect and one with a texture added.

I decided that my subject would be this green bench in the Taylor Quad in the middle of the Brigham Young University – Idaho campus!

Texture Blend:

For this texture blend I took a picture of the subject, a bench, and added a mask on the bench side. The texture is chipped paint on a concrete wall from textures.com.

Landscapes:

For each of these landscape images I wanted to make sure I included the buildings in the background to highlight the landscape while keeping the subject in the shot. In the second image I also wanted to include some of the rocks from a fountain and pond in the foreground.

Humanizing:

When taking this shot I tried to find something that would fit with the subject. I felt that shoes would be appropriate because we all wear our shoes when taking a walk, but sometimes we all just need to take a seat and take time to think and ponder while running this marathon we call life.

More shots:

For these other shots I just wanted to experiment between lots of close up shots with bokeh as well as other shots that showcased both the foreground and background.

Design a site like this with WordPress.com
Get started